Wednesday, October 30, 2013

Recipe: Cheesy Broccoli & Rice Casserole

As we approach Thanksgiving, I've decided to showcase some of my absolute FAVORITE vegetarian side dishes. Since I don't eat turkey, I live on sides during the holidays... and I wouldn't have it any other way! Side dishes are the BEST, so I'll be posting one recipe a week until Thanksgiving to give ideas to my fellow vegetarians (or anyone with taste buds, really). 

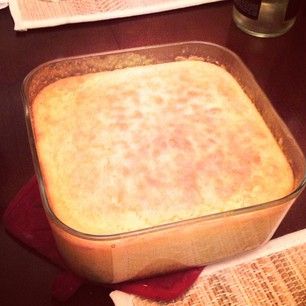
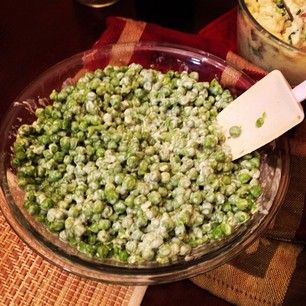
Who doesn't love a good casserole? That's my thinking, anyway. Casseroles are ALWAYS a big hit. When you take one somewhere, you come home with no leftovers, and that's how it should be. The cheesy broccoli and rice casserole will leave you empty-handed (and full-stomached). I even sneak in extra veggies (onions and celery, but carrots and zucchini would be great as well).

Ingredients Needed:
2 Cups Rice (I use long grain brown rice)
20 Ounce Bag of Frozen Broccoli
1 Can Cream of Mushroom Soup
1 Can Cream of Celery Soup
1 1/4 Cups Water
1 Onion (diced)
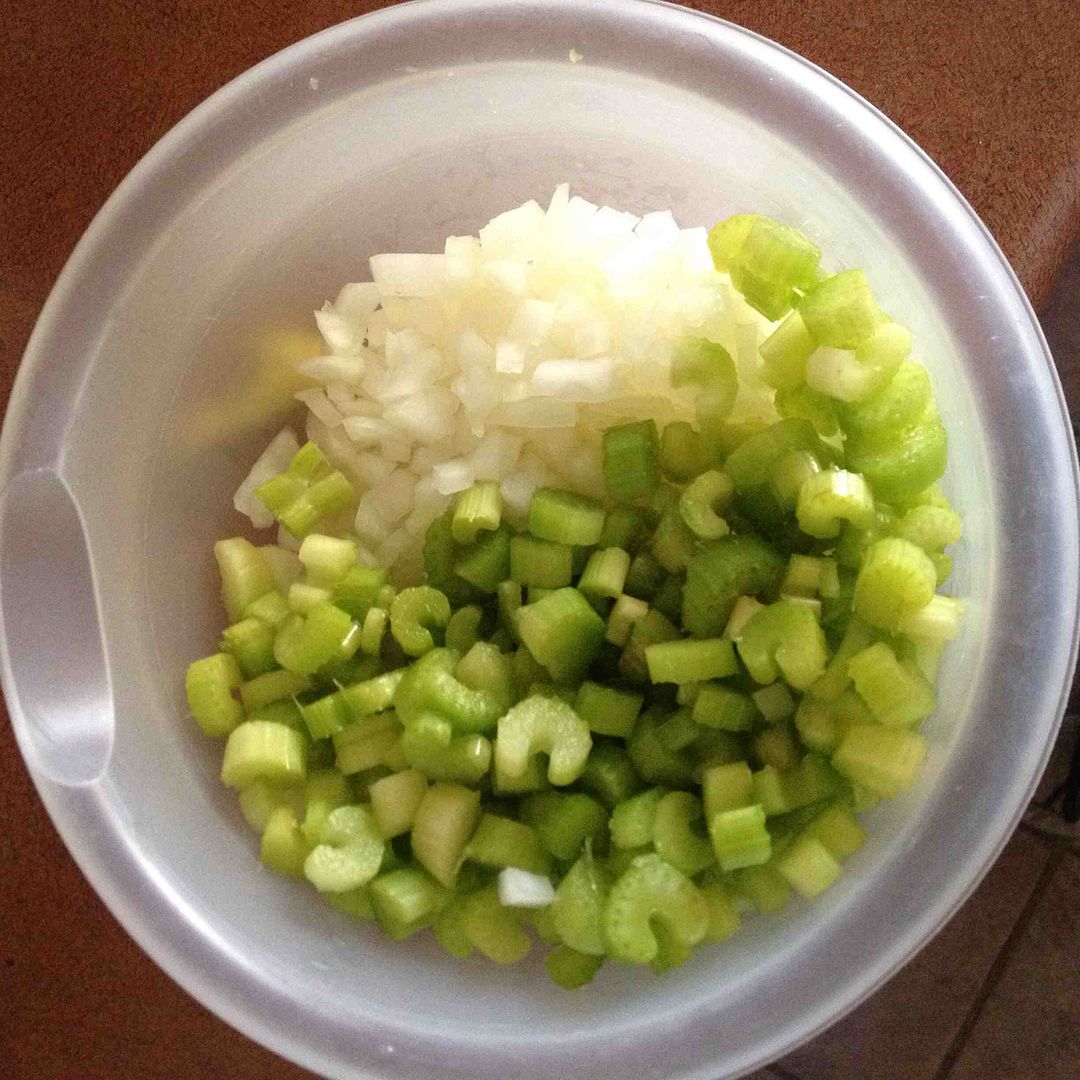
Celery (I use five pieces or so - diced)
2 Tablespoons Olive Oil
8 Ounces Velveeta Cheese
4 Ounces Sharp Cheddar Cheese (or any flavor you prefer / have on hand)

The Recipe:
*Pre-heat the oven to 350 degrees
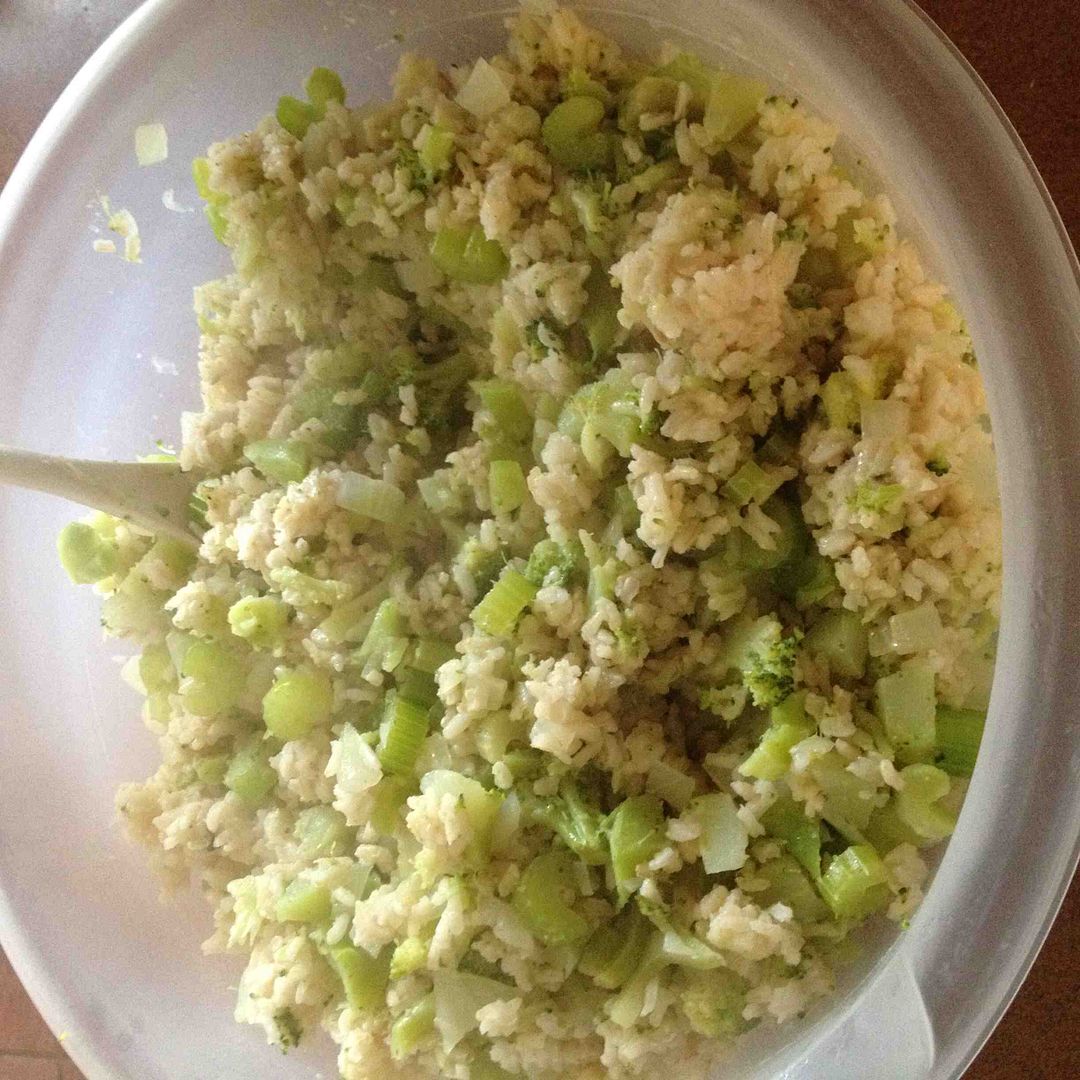
1. Cook rice according to package directions. Set it aside.
2. Sauté the onions and celery in olive oil until tender (about 7 minutes).
3. Combine both soups and water in saucepan, and mix well.
4. Add Velveeta cheese to soup mixture, and stir until it is all melted. 
5. Cook frozen broccoli in boiling water according to package instructions.
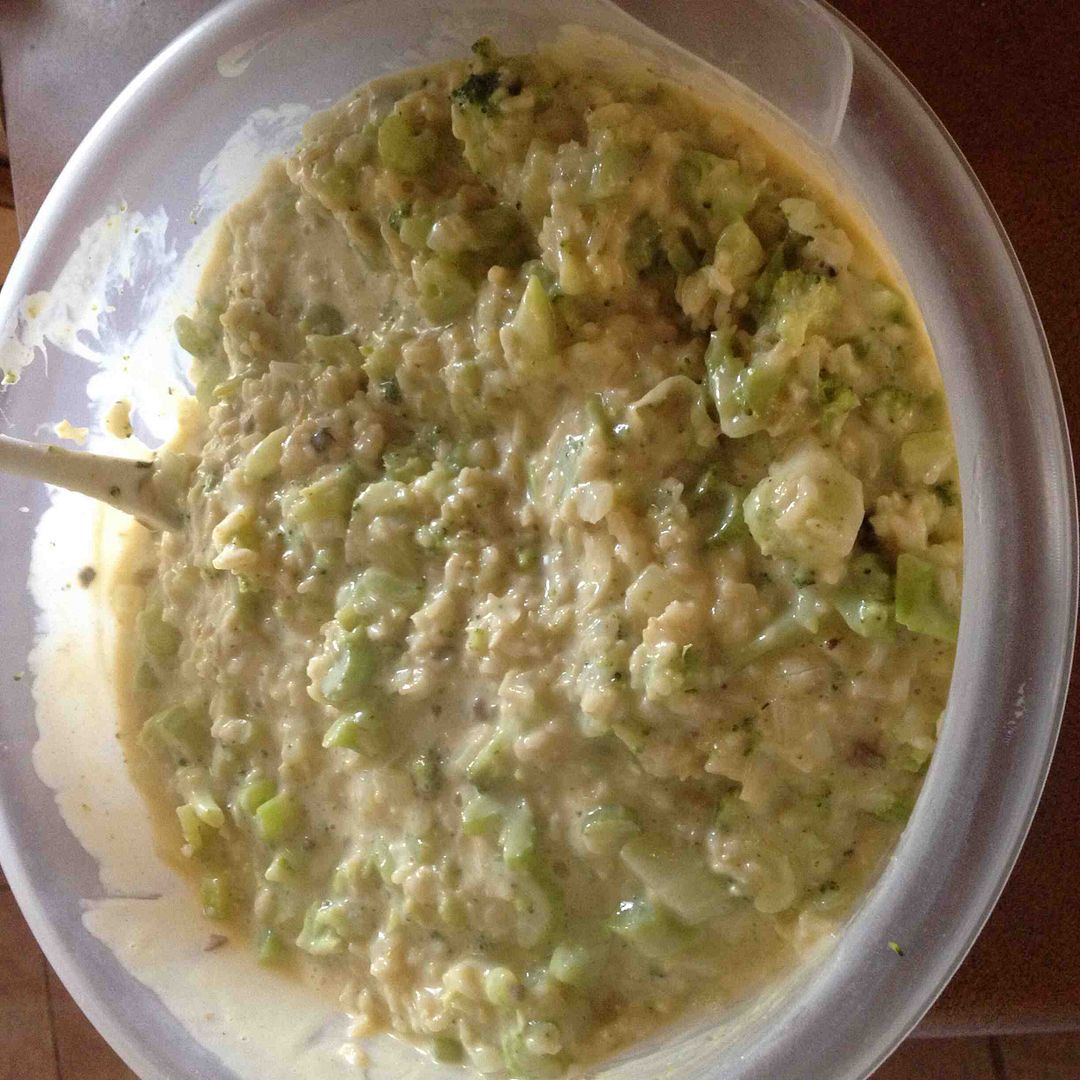
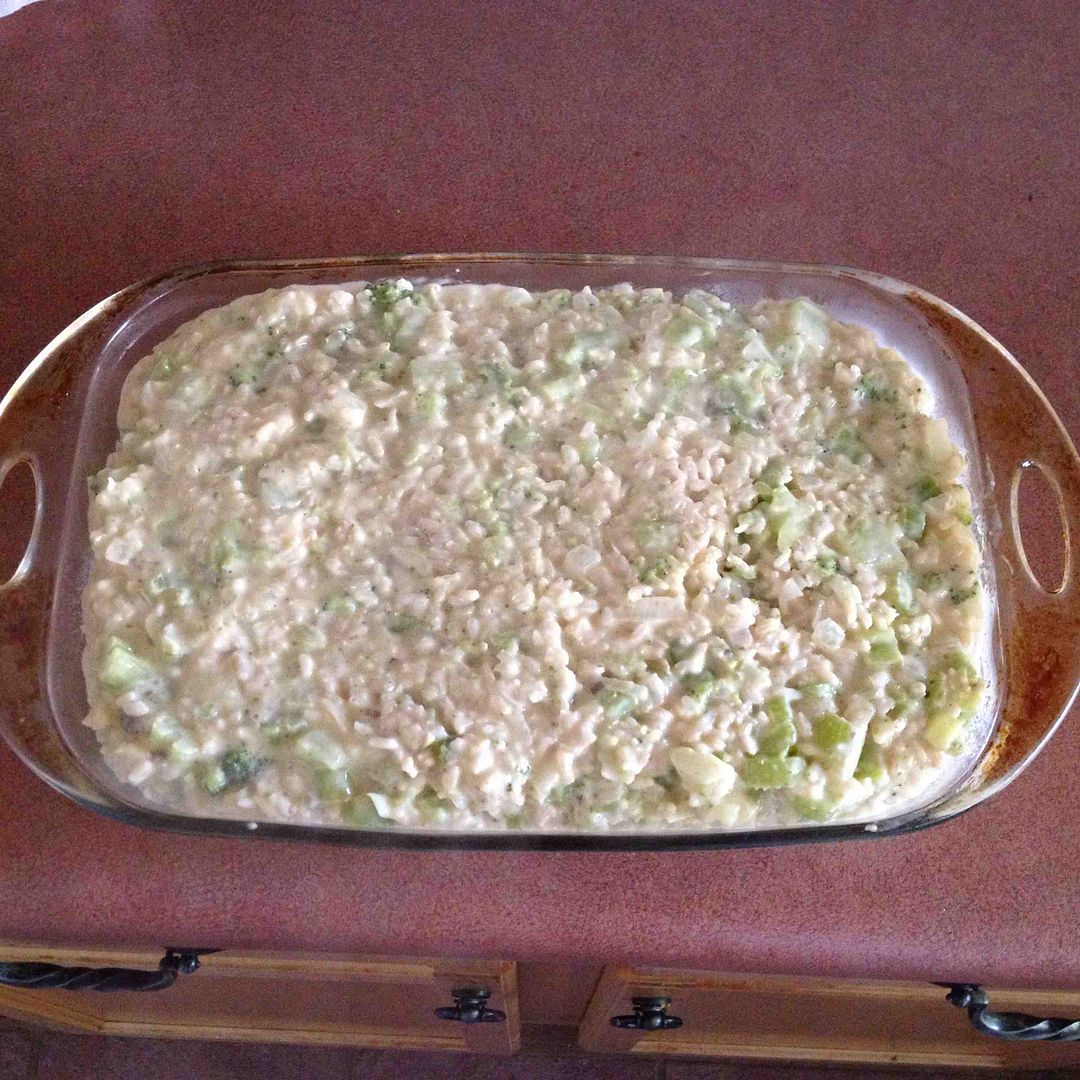
6. Mix rice, broccoli, onions/celery, and soup/cheese mixture together in a large bowl, and mix well.
7. Pour into casserole dish.
8. Bake for 35 minutes in the oven.
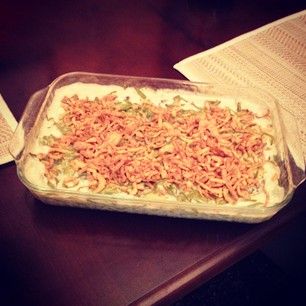
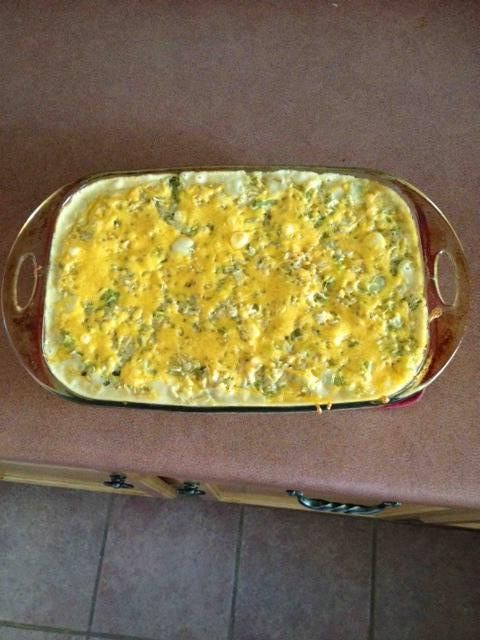
9. Add cheddar cheese to the top of the casserole.
10. Bake for an additional 10 minutes.
11. ENJOY!


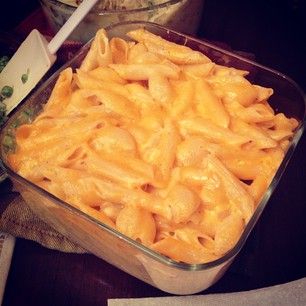
This is one of my go-to recipes. I make it in bulk and divide the contents into individual containers. This makes six days of lunches for me to take to work with me, and it's so easy to just grab a container and go in the mornings. It's also filling enough to be an entire meal (but having a piece of fruit along with it is great too!).


Monday, October 28, 2013

Life Lately

I haven't made any personal posts lately, so I thought I'd do that this morning.

Instead of another recipe (but just wait -- more are coming!) or book review, I decided to share what's been going on lately. This is not an all-inclusive list, but it's just some things I felt like sharing with my wonderful readers. 

1. I had a three day weekend, and it was much needed. We had parent/teacher conferences at school on Wednesday night and Thursday morning last week, so we all got Friday off. Sleeping in was wonderful, and I feel slightly recharged (but I think Thanksgiving break in about a month will really do the trick). 

2. My sports teams are doing really well this year, which is a nice change. My baseball team, the Kansas City Royals, barely missed the playoffs, but they had their BEST SEASON in several years. It was so much fun to cheer them on. My favorite college team, the University of Missouri Tigers, are 7-1 this football season, which is only their second in the SEC. They are holding their own and doing EXTREMELY well. My absolute favorite team of all time, though? The Kansas City Chiefs. And they are 8-0 for the first time in TEN years. This is pure excitement on my end. It's so much more fun being a fan to a winning team... but win or lose, I've always been faithful to my Missouri sports. 

3. I got to see one of my best friends ever this weekend! Lizzie came out to Colorado to see her husband for a quick weekend while he's at training, and we were able to see each other twice, which was so wonderful. It's really hard having a long distance best friendship... we talk every single night, sometimes for hours, and it was great to see her in person and have Jack Quinn's together one more time. 


4. Reality is setting in that Cadet Lovemuffin graduates from the Air Force Academy in just 212 days. He has been working his butt off for over four years now for this, and I can't believe that the end is finally approaching (but it could still be quicker, and I'd be okay with that). I will only be his fiancée for 214 more days; after that, I will be his wife, and I could not be ANY HAPPIER about that. This has been a really long road, but I am so ready for this part of our journey to conclude. He was supposed to find out his Air Force AFSC (job) a couple weeks ago, but that has been delayed due to the government shutdown (yes, I know it's over; no, he still doesn't know when he'll find out). Keep him in your thoughts as he waits to find out because this is a HUGE deal! 


Friday, October 25, 2013

Recipe: Candied Sweet Potatoes

As we approach Thanksgiving, I've decided to showcase some of my absolute FAVORITE vegetarian side dishes. Since I don't eat turkey, I live on sides during the holidays... and I wouldn't have it any other way! Side dishes are the BEST, so I'll be posting one recipe a week until Thanksgiving to give ideas to my fellow vegetarians (or anyone with taste buds, really). 

Sweet potatoes are one of my favorite foods on earth. I absolutely love them plain. They make a fantastic dinner all on their own. That said, during the fall, I LOVE jazzing them up a bit by using the canned kind (come on - it seems like a treat even if it isn't!) and adding lots of yummy toppings. This dish makes the perfect accompaniment to a Thanksgiving feast, or it works well for a dessert.

Ingredients Needed:
1 15 Ounce Can Yams (Drained)
1 Teaspoon Butter
2 Tablespoons Water
2 Tablespoons Brown Sugar
1/2 Teaspoon Cinnamon
1/2 Teaspoon Nutmeg
Handful (Vegetarian) Marshmallows (Whole Foods has gelatin free marshmallows)

The Recipe:
*Pre-heat the oven to 350 degrees
1. Melt butter in a skillet.
2. Add water, brown sugar, cinnamon, and nutmeg.
3. Heat two minutes - until bubbly
4. Add yams to a baking dish.
5. Spoon sauce from skillet over the top.
6. Bake for 15 minutes.
7. Add marshmallows to the top.
8. Bake for another 5 (or so) minutes - until marshmallows brown on top
9. ENJOY!


Wednesday, October 23, 2013

Recipe: Creamy Cornbread Casserole

As we approach Thanksgiving, I've decided to showcase some of my absolute FAVORITE vegetarian side dishes. Since I don't eat turkey, I live on sides during the holidays... and I wouldn't have it any other way! Side dishes are the BEST, so I'll be posting one recipe a week until Thanksgiving to give ideas to my fellow vegetarians (or anyone with taste buds, really). 

I made this dish last Thanksgiving for the first time. I wasn't expecting much from it. I made it more as a filler so I would have enough food to serve to my fiancé and my brother (who was visiting from out of town). That said, I fell in love with it. This cornbread casserole was SO good that I ate all the leftovers the next day. It may not sound like much, but it's REALLY good and SUPER simple.

Ingredients Needed:
1 Can Whole Kernel Corn, Drained
1 Can Creamed Corn,
8 Ounces Sour Cream
1 Package Jiffy Cornbread Mix
1/2 Cup Butter, Melted
2 Eggs, Beaten

The Recipe:
*Pre-heat the oven to 350 degrees
1. Combine all ingredients in a buttered 8 inch baking dish (glass works best).
2. Stir until all ingredients are mixed well.
3. Bake one hour at 350 degrees.
4. ENJOY!


Friday, October 18, 2013

DIY Scratch Off Coupon Book


This post is overdue. And that is an understatement. What I mean is that I made this scratch off coupon book over a year ago. I gave it to my fiancé last October. Yes, it's been a year. And yes, I should have shared this months ago... but hey, I am just getting around to it, so take it or leave it. 

I first got this idea when I was trying to figure out something special and unique for Dan. I feel like I'm always giving him things I make, and while I know he enjoys them, I wanted to do something different. This coupon book won. 

First, I made each page on Adobe Photoshop. They look like the example below, but there are 14 coupons in total in the book I made. 


Then, I printed the coupons out from my inkjet printer at home. They're nothing fancy, but they look nice enough to be considered "special".

After that, I chopped them up so they were the right size. I needed them to fit on 5x7 cardstock that I had picked out, so I just cut them down.


Before gluing them onto the cardstock, I used my "fancy scissors" to make them look a little nicer and less plain.


And then I glued them on. I chose several different colors of glittery cardstock so these would look fun and go with the "scratch off" theme. Dan loves gambling, so I thought this would be especially fun for him.


After they were all glued on, I decided to make the "scratch off" part. This wasn't difficult, but it was slightly time consuming. I first covered each circle with clear packing tape. This took a while because I wanted the tape to only fill the circles, and tape is difficult to cut. Trust me. If you haven't tried, have fun. Then, I mixed liquid dish soap with silver acrylic paint to make the "scratch off" solution. I simply painted the mixture (sloppily) into the circles. The first ones looked awful. I got progressively better at it. I feel like if I do this again, it will look much better. If you want to try this, do a few practice circles first!


After the paint dried, I put the cardstock pages in the order I wanted them in (obviously arranged by color because I'm just like that) and hole punched the sides. I held them together with binder rings. I am such a teacher, but it worked really well. 


Overall, I am extremely happy with how this project turned out. Dan had a lot of fun using the coupons for various things. The great part of this project is that you can customize the coupons so that your boyfriend/fiancé/husband loves each of them!
  • Have you ever made a coupon book?
  • What's your favorite homemade gift you've given your significant other?
  • Does your significant other enjoy the projects you make for him?

Wednesday, October 16, 2013

Recipe: Creamed Peas

As we approach Thanksgiving, I've decided to showcase some of my absolute FAVORITE vegetarian side dishes. Since I don't eat turkey, I live on sides during the holidays... and I wouldn't have it any other way! Side dishes are the BEST, so I'll be posting one recipe a week until Thanksgiving to give ideas to my fellow vegetarians (or anyone with taste buds, really). 

This recipe is one of my favorites from childhood. Yes, I was that weird kid that loved vegetables. Really. This is NOT the healthiest veggie recipe, though, so don't count on getting in all of your nutrients with this one... Fat content, though? Heck yes! Plus, this recipe is SUPER SIMPLE!

Ingredients Needed:
1 Bag of Frozen Peas
1 Tablespoon of Butter
2-4 Ounces of Milk
8 Ounces of Cream Cheese (I like the garlic/chive kind the best with this, but plain also works well)
Salt and Pepper (to taste)

The Recipe:
1. Add frozen peas to a large pot of boiling water.
2. Boil for about 10-12 minutes or until peas are as soft as you want them.
3. Strain water from peas.
4. Add butter and milk, and stir well.
5. Add cream cheese a little bit at a time, stirring to mix it all in.
6. Add salt and pepper. I LOVE this recipe with quite a bit of pepper.
7. ENJOY!


Friday, October 11, 2013

Book Review: The Moon and More

It's been a while since I've reviewed a book on here. Why? Simply because I have not been reading as much as I should. Over the summer, I essentially read nothing. I think I crave the routine that comes along with a new school year. Since then, I've been reading nearly every night again, and I am on track to finish my 36 book goal for the year of 2013. 

Today, I'm going to tell you about The Moon and More by Sarah Dessen.

I'm a big fan of Sarah Dessen. I have been for years. Her books aren't normally the type I read, but I ALWAYS dive right into her novels and don't come back up for air until I finish them. 

As always, Goodreads provides a wonderful synopsis: 

Luke is the perfect boyfriend: handsome, kind, fun. He and Emaline have been together all through high school in Colby, the beach town where they both grew up. But now, in the summer before college, Emaline wonders if perfect is good enough.

Enter Theo, a super-ambitious outsider, a New Yorker assisting on a documentary film about a reclusive local artist. Theo's sophisticated, exciting, and, best of all, he thinks Emaline is much too smart for Colby.

Emaline's mostly-absentee father, too, thinks Emaline should have a bigger life, and he's convinced that an Ivy League education is the only route to realizing her potential. Emaline is attracted to the bright future that Theo and her father promise. But she also clings to the deep roots of her loving mother, stepfather, and sisters. Can she ignore the pull of the happily familiar world of Colby?

Emaline wants the moon and more, but how can she balance where she comes from with where she's going?

Sarah Dessen's devoted fans will welcome this story of romance, yearning, and, finally, empowerment. It could only happen in the summer.

Just like each of Dessen's novels, this one did not disappoint. I instantly knew who I wanted Emaline to be with, and my view actually changed as the story progressed. The Moon and More is a fun read, and I will be recommending it to everyone who asks me what book they should read next. 
  • Do you enjoy Sarah Dessen books?
  • Which of hers is your favorite?
  • Who is your favorite author?


Wednesday, October 9, 2013

Recipe: Creamy Garlic & Chive Mashed Potatoes

As we approach Thanksgiving, I've decided to showcase some of my absolute FAVORITE vegetarian side dishes. Since I don't eat turkey, I live on sides during the holidays... and I wouldn't have it any other way! Side dishes are the BEST, so I'll be posting one recipe a week until Thanksgiving to give ideas to my fellow vegetarians (or anyone with taste buds, really). 

Everyone loves mashed potatoes, right? Not exactly. I actually used to hate them. I'm THAT weirdo. However, after several years, I decided to try them again... and I made up a recipe that includes one of my favorite things: cream cheese. Yep. These bad boys are ooey and gooey and creamy and delicious!

Ingredients Needed:
6-8 Yukon Potatoes
6 Tablespoons of Butter
8 Ounces of Cream Cheese (Garlic/Chive flavored works best!)
1/2 Cup of Milk
1 Tablespoon Onion Salt
1 Teaspoon Pepper

The Recipe:
*Some people prefer to peel their potatoes first. If you like them that way, do it. I just like the texture of the skin.
1. Cut potatoes into cubes (the smaller they are, the quicker they cook!)
2. Boil in a large saucepan until tender (poke with a fork to check). This is usually about 30 minutes for me.
3. Drain the water from the potatoes in a strainer.
4. Add potatoes back to large saucepan.
5. Mash the potatoes with a potato masher
6. Add the butter, and mix it well into the potatoes until it melts.
7. Add in cream cheese, and stir it well.
8. Add milk, and stir it all up well.
9. Add onion salt and pepper.
10. ENJOY!

**I like sautéing onions and garlic until they are tender and mixing them in to the potatoes as well for an extra kick. I promise - it's delicious!


Monday, October 7, 2013

Recipe: Green Bean Casserole

As we approach Thanksgiving, I've decided to showcase some of my absolute FAVORITE vegetarian side dishes. Since I don't eat turkey, I live on sides during the holidays... and I wouldn't have it any other way! Side dishes are the BEST, so I'll be posting one recipe a week until Thanksgiving to give ideas to my fellow vegetarians (or anyone with taste buds, really). 

Love green beans? Me too! This recipe is my favorite EVER for green bean casseroles, and I've been putting it together since I stirred it with my hands as a little kid. (Thanks, Mom, for letting me do that... I still enjoy it, actually - sshhh!)

Ingredients Needed:
1 Can Cream of Mushroom Soup
1/4 Cup Milk
2 Cans of Cut Green Beans (drained)
1 1/3 Cups French Fried Onions
Salt and Pepper to Taste

The Recipe:
*Pre-heat the oven to 350 degrees
1. Combine soup, milk, and pepper in a casserole dish.
2. Stir until well mixed.
3. Add green beans.
4. Add 2/3 cup of the French fried onions.
5. Bake at 350 degrees for 30 minutes.
6. Stir well.
7. Add remaining 2/3 cup French fried onions to the top.
8. Bake for another 5 minutes until onions are golden.
9. ENJOY!


Wednesday, October 2, 2013

Recipe: Macaroni & Cheese (With Onions & Garlic)

As we approach Thanksgiving, I've decided to showcase some of my absolute FAVORITE vegetarian side dishes. Since I don't eat turkey, I live on sides during the holidays... and I wouldn't have it any other way! Side dishes are the BEST, so I'll be posting one recipe a week until Thanksgiving to give ideas to my fellow vegetarians (or anyone with taste buds, really). 

This recipe is a favorite of mine. No, it's not healthy. I won't even lie about that. But this is THE BEST COMFORT FOOD you will EVER find!

Ingredients Needed:
Medium Pasta Shells
Penne Pasta
1/2 of an Onion (your favorite kind)
2 Cloves of Garlic
4 Tablespoons of Butter
2 Tablespoons of Vegetable Oil
1 Cup of Milk (I use almond milk, but cow's milk works great too)
1/2 Block of Velveeta Cheese
2 Cups Shredded Cheese (any kind - I like to mix several different kinds in)
Salt/Pepper to taste

The Recipe:
1. Cook pasta (both types together) to your preference. I like it just softer than al denté.
2. While the pasta is cooking, dice your onion and garlic into small pieces.
3. Add vegetable oil and onions to frying pan, and sauté them on medium heat for about five minutes.
4. Add the garlic to the onions and continue cooking over low heat for another two to three minutes.
5. Remove onions and garlic from heat.
6. Strain pasta.
7. Add butter, milk, and Velveeta cheese to the saucepan to create a creamy sauce.
8. Add the pasta back into the saucepan with the sauce, and stir it up.
9. Add the sautéed onions and garlic to the saucepan.
10. Add the shredded cheese gradually, stirring as you go.
11. ENJOY!


I hope you enjoy this recipe! It's my go-to mac & cheese recipe when I have people over since it's such a crowd pleaser! Let me know what you think if you decide to try it!